Buying guide for Best airbrushes
If you want to take your painting skills to the next level, the best way to do that is with an airbrush. Whether you are creating dazzling artwork on paper or giving a model Corvette a glossy coat of cherry red paint, nothing can create that smooth, even finish like an airbrush. However, if you’re new to airbrushing, finding the best one may seem like a daunting task.
Fortunately, learning how to find the right airbrush isn't all that complicated. There are only three main aspects of airbrushing that you need to understand in order to develop a firm grasp of how an airbrush works. After you've learned those, you'll be able to choose the airbrush that’s perfect for you.
Key considerations
If you’ve never done airbrushing before, picking out your first airbrush can be overwhelming. The trick is to examine the three main aspects of the tool so you can determine the type of airbrush that’s best for you: how the paint feeds into the airbrush, where the paint and the air mix, and how much control you have over the air and the paint. The following sections explore each of these aspects in a little more depth.
Feed
There are three ways to get your paint into the airbrush so it can be atomized and applied to the surface you’re working on. Each delivery system has its advantages, and the type of feed you ultimately choose will be based on your preference.
Gravity: An airbrush that is fed by gravity simply means the cup that holds the paint is higher than the nozzle. The main advantage to using a gravity feed is that it requires less air pressure to operate. The result is that it increases your ability to produce detailed work. The downside is that the cup doesn't hold much paint, and it requires a little more diligence to clean.
Siphon: On this type of airbrush, the paint bottle is located lower than the nozzle. As the air rushes out, the paint is drawn up through a small tube and then atomized and sprayed. The benefit of this type of feed is it’s less expensive and, if you have several bottles, each can contain a different color to make changing colors easier. On the downside, it takes more air pressure to function, so it’s much harder to do detailed work with this type of airbrush. Additionally, the bottle must always contain more paint than you need for it to coat evenly. In short, a siphon feed is best for covering large areas with less detail.
Side: This type of airbrush is best thought of as an adaptable hybrid. Depending on the cup used, it can function as either a gravity feed or a siphon feed. In most instances, it’s easier to see what you’re doing with a side feed than it is with a gravity feed. It also can hold more paint, and you can use it at any angle you like – even lying on your back. The downside is the cups are a little more costly, they can be harder to clean, and the spraying behavior will vary from attachment to attachment.
Mix
Now that you know the three ways to get the paint into the airstream, we can move on to the mixing point. This is the location where the paint gets mixed with the airstream. There are two options: internal or external. There is some debate about exactly what these terms mean in a technical sense, but rather than get involved in that, we'll explain how each of these mixing points can be beneficial to you.
Internal: The internal mix offers the most consistent, smooth result because the atomization of the paint is better with this method. This gives you a well-balanced distribution of paint, which will allow for greater control. On the negative side, this type of mixing works better with thinner paints because it clogs far more easily than external mixing. An airbrush with internal mixing must also be cleaned more frequently to ensure the tool stays at peak performance.
External: External mixing allows you to use thicker paint, and it’s an easier unit to clean in general. The downside is that the spray can be uneven or slightly lopsided, which produces patterns that are more concentrated on one side than the other. Additionally, it’s more difficult to execute detailed work with this type of mixing.
Control
This third part is where the user's skill comes into play. The trigger is how you control the spray. This is the most crucial element, especially for beginners. You have two choices: single-action or double-action trigger.
Single-action trigger: Just like it sounds, you have one action to perform while painting: press the button. When you press the button, the airbrush turns on. When you take your finger off the button, the airbrush shuts off. You can use a knob to set the amount of paint that comes out with each press, but that shouldn't be touched while you’re pressing the button. With these models, you have very little control over your stroke. You can think of it as similar to using a can of spray paint.
Double-action trigger: On a double-action airbrush, you press the button down to turn on the air. After that, you judiciously pull the button back to increase the flow of paint. If you want to decrease or stop the flow of paint, you slide the button forward. This type of airbrush provides the user with an incredible amount of control, but learning to wield that control as a meaningful artistic expression can be rather difficult.
Airbrush prices
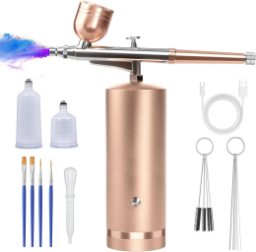
Inexpensive: At the lower end, for about $10 to $25, you can get a beginner airbrush. However, if you move up just a little bit, to the $25 to $45 range, you’ll find airbrushes that feature multiple cups and nozzles and needles so you can fine-tune the work that you do.
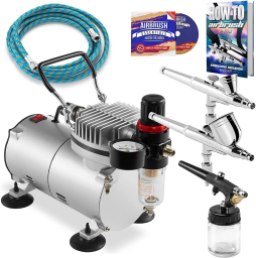
Mid-range: From $45 to $100, you’ll find complete kits that come with an airbrush and a compressor.
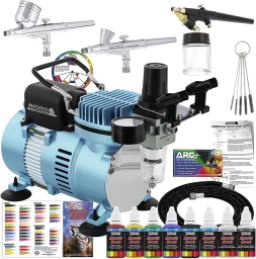
Expensive: Between $100 and $200, the kits feature many luxuries, such as multiple airbrushes, a carrying case, an air compressor with an air receiver tank, and more. These types of bundles are for the more serious and experienced users.
Airbrush cleaning tips
The most important airbrush skill to learn is how to clean it. Cleaning your airbrush too often is not a problem but neglecting to clean your airbrush just once can cause headaches. As long as you haven’t dropped or damaged your airbrush, if it starts to malfunction, it often simply needs a good cleaning. The instructions that come with yours tell you how to best clean your particular model, but the following are some general tips that work with most airbrushes.
- Don't soak your airbrush. Even though it might sound like a simple cleaning solution, doing so will actually damage the more sensitive parts of the tool.
- Do not use WD-40, gasoline, or ammonia on your airbrush. WD-40 and paint do not mix well, and it could cause some undesirable results the next time you use your airbrush. If the trigger starts to feel sticky, use one of the special lubricants that are specifically designed for airbrushes.
- Start with water. Before filling your cup with airbrush cleaner, use some water. Water is far less expensive, making it a more economical solution for those initial rinses.
- Take your airbrush apart. Although you won't have to do it with every cleaning (unless you want to), it’s advisable to occasionally disassemble your airbrush to perform a deep cleaning.
- Try back flushing. This is a cleaning technique in which there is cleaning fluid in the cup and you cover the nozzle with your finger or a paper towel and press down slightly on the trigger. This helps clean the narrow chamber around the needle.
- Purchase an airbrush cleaning kit. This will give you the best airbrush cleaning experience.
FAQ
Q. My work looks horrible. Is there something wrong with my airbrush?
A. If you're a beginner and there's a problem with your finished work, it’s likely a user error. This may sound harsh, but the airbrush is a tool that can be very hard for some individuals to master, even those with a great deal of natural artistic talent. Think of using an airbrush as like learning a skill in sports. You don't start off with a perfect jump shot – it takes practice. There’s a pretty steep learning curve when it comes to using an airbrush, so don’t beat yourself up over early mistakes.
Q. What is masking?
A. When you need a sharp edge while airbrushing, masking is the technique you use. It's the same idea as using painter’s tape to keep the edges of your walls crisp when painting a room. However, you can use a tool like a triangle or a French curve, virtually anything that has the shape you need and you're not worried about it getting covered in paint.
Q. Are there any health concerns that I should be aware of when airbrushing?
A. Yes. Do not inhale while working. However, since most people find it impossible to not breathe, purchase a mask or a respirator that is approved for the type of paint you’re using. Just because paint is labeled nontoxic, that doesn’t mean it’s safe to breathe into your lungs. Also, always work in a well-ventilated area and protect your skin and eyes.