Buying guide for best self-tanners
Ready to buy now? Shop the best:
Your summer tan doesn't have to come at the cost of healthy skin. UV tanning beds or lying out in the sun without adequate sunscreen can cause UV damage, wrinkles and possibly cancer. But self-tanning products can safely help you achieve a golden glow without solar assistance.
Whether you prefer a light-as-air tanning mousse, a gradual tanning lotion or tanning drops mixed with your favorite moisturizer, there’s a perfect product for every preference. And don’t worry about looking orange or streaky. Modern self-tanners have come a long way from their overly orange predecessors and are formulated to deliver a much more natural-looking effect.
Still, with the multitude of products on the market, you want to find the right version for your complexion, skin care concerns and application preference. Also, if you’re a self-tanning beginner, certain products make proper application easier than others.
To simplify your shopping, we’ve rounded up 15 of the best self-tanners out there. Our top pick is the St. Tropez Self-Tan Classic Bronzing Mousse because it’s lightweight, fast drying and beginner friendly.
Best self-tanners
St. Tropez Self-Tan Classic Bronzing Mousse
Our top pick, this light, quick-drying mousse has built a strong following for good reason. It’s easy for self-tanning beginners to apply, and it spreads effortlessly with the included applicator mitt. The buildable color gives a natural look without the strong, pungent odor many self-tanners have.
Jergens Natural Glow Instant Sun Body Mousse
The selling point of this reliable drugstore staple is its budget-friendly price. Still, it delivers results that are compatible with pricier options. It dries completely in less than a minute to leave a golden-brown glow on skin.
Coco & Eve Sunny Honey Bali Bronzing Self-Tanner Mousse
For a natural golden glow without uneven color streaks, Coco & Eve’s mousse does the trick. It offers an easy transfer-resistant application that won’t stain towels or furniture. The best part is the tropical mango scent, which is a far cry from the classic self-tan chemical odor.
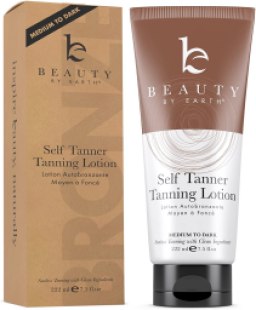
Beauty by Earth Self-Tanner Tanning Lotion
Skin-nourishing ingredients like organic aloe and shea butter extracts make this cruelty-free lotion a standout pick. And the softening formula won’t dry skin. It leaves a natural golden-brown color that won’t turn orange.
Tan-Luxe The Body Illuminating Self-Tan Drops
Tanning drops are convenient because you can mix them into your favorite moisturizer for a customized glow using a product you already love. The Tan-Luxe version is a splurge, but it’s packed with moisturizing ingredients like raspberry seed oil and aloe vera, plus, it’s free of parabens, sulfates and phthalates. It works with any moisturizer or body lotion; the more drops you add, the deeper the resulting color.
Tan Towel Self-Tan Towelette
The benefit of a towelette is the product is soaked into a single-use cloth, so you’ll always use the perfect amount. These towelettes are infused with a clear self-tanning formula that works with the proteins and amino acids in skin to produce a healthy, natural sunless tan in just a few hours. Towelettes are also easy to pack for travel or use on the go.
L’Oreal Paris Sublime Bronze Self-Tanning Water Mousse
Skin gets an instant natural glow from this drugstore favorite. The mousse is lightweight and hydrating thanks to real coconut water and vitamin E, plus it has a delightful coconut scent that conjures up a beach with one whiff. It develops on skin for four to eight hours before showering it off. For a longer-lasting tan, repeat the application three times over 12 to 48 hours.
St. Moriz Original Instant Tanning Mousse
This vegan tanning mousse stands out for its quick-drying abilities. You’ll have a natural, sun-kissed glow just an hour after application (leave the product on up to three hours for a darker tan). Consistent application is ensured with the use of a tanning mitt.
COOLA Organic Sunless Tan Dry Oil Mist
This sunless tanning mist delivers a subtle, dewy radiance that lasts for up to three days, but it can be reapplied daily if you want to maintain peak glow. Organic aloe helps soothe and soften skin, supporting moisture retention, while organic argan oil, rich in fatty acids and vitamin E, provides instant hydration.
Dr. Dennis Gross Alpha Beta Glow Pad Self-Tanner for Face
This premoistened towelette provides mess-free application, resulting in a streak-free, natural tan that develops over three to four hours. Beyond that, skin care benefits include alpha and beta hydroxy acids, which exfoliate by buffing away dead skin cells and decongesting clogged pores. Use it on your face, neck and decollete.
Body Drench Quick-Tan Self-Tan Dry Oil
For those who prefer a sheer, natural tan with just a hint of shimmer, consider this illuminating dry oil. Spritz this all over your body and watch your tan develop over two to three hours.
How self-tanners work
Unlike UV rays, self-tanners don't penetrate the epidermis but act only on the outermost layer of the skin. If you’re new to the world of self-tanners, the way they work might surprise you.
Most self-tanners rely on a natural sugar known as dihydroxyacetone (DHA) to safely impart a golden hue. Rather than actively staining or dyeing the skin, DHA reacts with the amino acids of dead skin cells on the surface of the epidermis to cause a browning effect. Typical concentrations of DHA range between 2% and 5%, with higher concentrations producing a deeper tan.
Because skin is constantly renewing itself, the outer layer of the epidermis is routinely sloughed off. For this reason, the effect of a self-tanner generally lasts only about a week, and it will gradually lighten as your skin sheds dead cells. The overall shelf life of your sunless tan will largely be determined by your skin’s natural exfoliation process.
Types of self-tanners
When it comes to selecting a self-tanner, you’ll be spoiled for choice. Today’s options are available in a variety of formulations that are easy to use. As long as a self-tanner suits your skin tone and is applied correctly, any formulation can yield the desired results. Choose a self-tanner that caters to your personal needs and preferences, but don’t forget to give the application method and your level of skill some thought as well.
Moisturizing
If you're a beginner, a tanning moisturizer might just be the best place to start. These products generally have significantly lower concentrations of DHA, allowing users to gradually build color over the course of a few days. As an added bonus, they also provide hydration to thirsty skin.
Spray
Most self-tanning sprays produce a fine mist. These work best for quickly and easily covering larger areas like the torso, legs and back. When using a spray tanner, remember to hold the bottle about 6 inches away from your body. You might want to enlist the help of a friend for hard-to-reach areas like your back. Don’t forget to rub in the color.
Lotion or cream
Most self-tanning lotions and creams are tinted with built-in color guides, allowing you to easily spot any gaps in your initial application. They also take a little longer to dry. While this affords you some extra time to blend and touch up, it also makes them a tad messier.
Towelette
Soaked in just the right amount of self-tanning solution, towelettes leave little chance that you’ll apply too much. With fuss-free application that’s hard to mess up, self-tanning towelettes work well for touch-ups on the go. These are also a good option for beginners.
Mousse or gel
Most mousses and gels have a lightweight consistency that spreads easily and dries quickly. This can make layering and contouring easier for experienced users, but beginners beware. The fast-drying formula gives you a considerably smaller window for blending.
Drops
Tanning drops are not meant to be used on their own. Rather, add a few drops to your favorite regular lotion or moisturizer to turn it into a tanning lotion. (We recommend putting a small amount of lotion on your hand first, then mixing in the drops, not adding the drops directly into the container of lotion.) This is another great method for beginners since the amount of tan is customizable depending on how many drops you use.
Self-tanner considerations
Before you grab that bottle of liquid gold, be sure to think about the following.
Skin tone
Even the best self-tanners can produce undesirable results if the strength isn't appropriately matched to your natural color. It’s an easy mistake to make. You want a deep tan, so you instinctively reach for the darkest self-tanner. Unfortunately, using a shade that’s worlds apart from your skin tone can produce a noticeably unnatural hue. As a rule of thumb, it’s best to choose a self-tanner that matches your existing skin tone. If your skin is especially fair, mistakes are more likely to stand out in stark contrast to your natural tone. You would do well to opt for a gradual tanner that builds color slowly.
Ease of use
Choosing a self-tanner that’s easy to use not only increases your chances of beautiful results but also makes those results easier to maintain. Being comfortable with the application method is vital if you want to achieve a consistently golden glow. While some prefer the quick coverage of spray self-tanners, others might appreciate the hands-on control of lotions or creams. Shop around for a self-tanner that works for you.
Quantity
Many people reach for a self-tanner as a complexion booster when going on holiday or to a special event, and others incorporate the product as part of a regular beauty routine. Either way, we recommend purchasing a quantity that allows for at least two to three reapplications. Having extra self-tanner on hand will enable you to add another layer if necessary, and you’ll be covered should your tan wear off a little more quickly than expected.
How to apply self-tanner
Once you’ve selected the best self-tanner for your needs, it’s up to you to optimize the results. Follow these tips and you’re good to glow!
Read the instructions first. This is crucial even if you’ve applied self-tanner before. Formulations vary from product to product, and some you’re familiar with might change slightly every once in a while.
Exfoliate your skin before applying self-tanner. Dry skin tends to absorb more color, which is why heels, elbows, ankles and knees often end up looking darker. Exfoliate prior to applying a self-tanner and give these problem areas a little extra attention to help prevent dark patches.
Thoroughly dry your skin before applying self-tanner. To avoid accidental dilution and an uneven finish, thoroughly towel dry your skin and wait another 10 minutes to allow any remaining moisture to evaporate.
Moisturize dry spots first. It might seem counterintuitive to add moisture after thoroughly drying your skin, but remember those problem areas? Massaging a small amount of lightweight lotion into the skin on your heels, ankles, knees, elbows and even around your nostrils can keep dry areas from becoming unnaturally dark.
Protect the palms of your hands. Use a mitt or wear latex gloves to keep your hands from absorbing too much color and turning orange. Alternatively, work in sections (legs, torso, arms, face) and wash your hands after each.
Start at the bottom and work your way up. You’ll have to bend over to apply self-tanner to your feet and legs. By starting at the bottom, there’s no chance of developing darker patches or lines in creases from bending over.
Use a little less self-tanner on your face. For a natural look, use a dime-size amount of tanner and start by dabbing it on the prominent areas of your face that tan the fastest (chin, bridge of the nose, cheekbones, forehead). Work your way out, using the leftover tanner on your fingers for the outermost areas rather than adding more. This will create a natural fade.
Relax and let the self-tanner set. Sweating and rinsing can reverse all your hard work. Kick back, relax, and keep your cool until your self-tanner sets completely. Check the directions to determine how long this will take, and map out enough time for yourself in advance.
FAQ
Q. How much should I expect to pay for a self-tanner?
A. Self-tanner prices can fluctuate depending on the quality of the ingredients, the formulation and even the brand. If you’re on a tight budget, it might be tempting to reach for the least expensive one available. However, many self-tanners priced below $10 take longer to develop or dry, have a strong odor or contain cheap ingredients that can irritate skin.
Many excellent self-tanners cost between $10 and $25. Often moisturizers that tan gradually cost a little less due to lower concentrations of the active coloring ingredients. Provided these products deliver most of the essentials you’d find in a regular daily moisturizer, a lower price isn’t necessarily a negative reflection of quality.
Select brands, organic ingredients and top-of-the-line formulations cost a bit more, from $25 to $40. Self-tanners in this price range place a premium on convenience, hypoallergenic ingredients and quality.
Q. Are bronzers the same as tanners?
A. Not quite. While both provide a sun-kissed look, bronzers are generally easy to remove while self-tanners offer a longer-lasting effect. If you’re feeling nervous about using a self-tanner, starting with a bronzer can help boost your confidence.
Q. Is there anything I can do to fix self-tanner streaks?
A. Sometimes self-tanning streaks happen despite your best efforts. Before you panic, try one of these damage-control methods:
- Lemon juice: This is a natural lightening agent. If the streaks are light, cut a lemon in half and rub it over the affected area. It might be enough to smooth things out.
- Lemon juice and exfoliation: More stubborn streaks might require a bit of scrubbing. Soak an exfoliating mitt in lemon juice and gently rub the streaky areas. The combined acidity of the lemon juice and the roughness of the mitt work to simultaneously lift and even out color.
- Lemon juice and baking soda: Baking soda doubles as both an exfoliant and a lightening agent, and used alongside lemon juice it might work to lift dark patches.
- Tan removers: These contain a mild form of bleach and are best reserved for emergencies. If you have exceptionally dark and hard to lift streaks, you might have to resort to using one of these.
- Makeup: If your streaks are small or limited, apply a bit of bronzer to any lighter areas to help conceal unevenness. You can also pick up a concealer that’s one or two shades darker than your natural skin tone to match your new tan and fill in any minor gaps.
Q. Can I shave after applying self-tanner?
A. It generally isn’t a good idea to shave or wax after applying self-tanner, because these are forms of exfoliation (which is best done before tanning). More often than not, this ends up removing color and ruining the effect. Always shave right before applying self-tanner. If you’re waxing, do so at least 48 hours before to avoid irritating the skin.